
Broadcast Campaign

To manage a call broadcast, we follow a defined procedure.
- Firstly, we shall create a lead list to which our call will be broadcast.
- Then, we upload or create the recording.
- Post that, we use the recording in an IVR or Auto Attendant.
- Finally, we will create a call broadcast campaign where we'll select the IVR or auto-attendant to be broadcast to the leads.
For Call broadcasting, we have to create a campaign where we have to enter all the details regarding the broadcast.
To create a campaign, follow these steps:
- Click on the Services tab placed on the side navigation.
- Click Outbound Services.
- Click Manage Campaign.
- A list of all the campaigns appears along with the relevant details.
- Click on Add Broadcast Campaign on the top-right corner of the page.

- Enter the campaign's general details like Name and Descriptionand click Save.
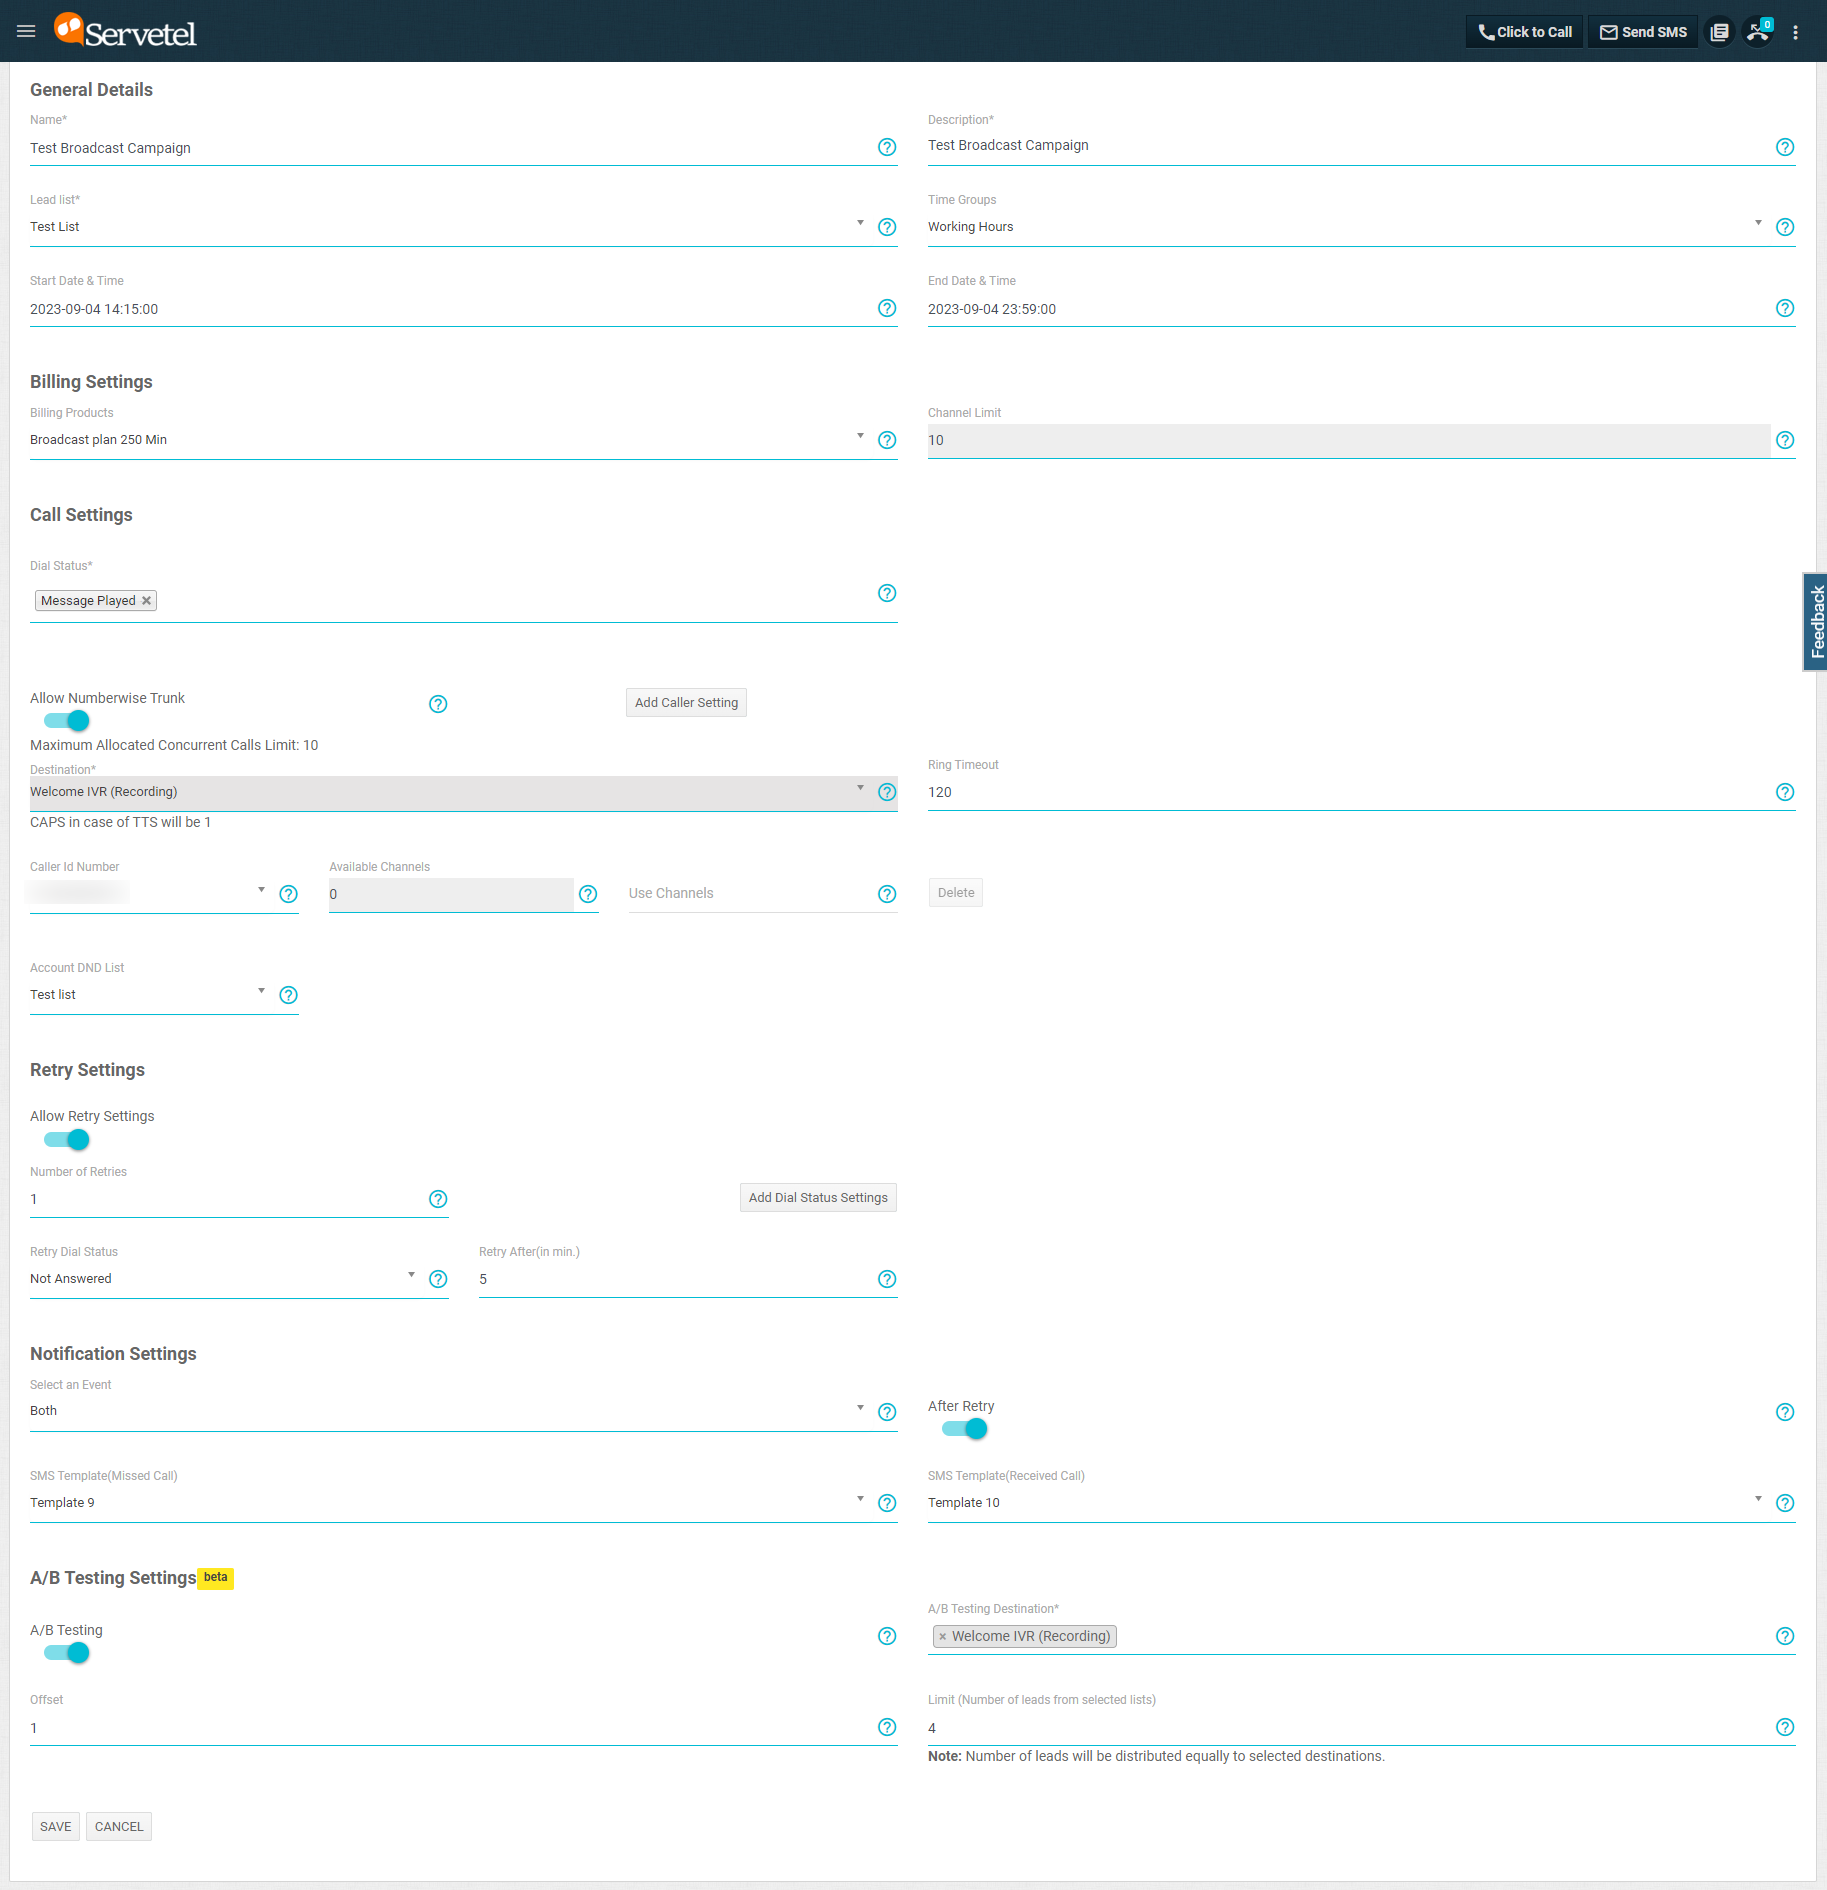
| Field | Description |
|---|---|
| Name | Name of the campaign. |
| Description | Details of campaign. |
| Lead List | Choose the list for which the campaign needs to be run. |
| Time Group | Choose the time group so that there will always be an active agent to attend the call. |
| Start data and time | Enter the start date and time for the call broadcast. |
| End date and time | Enter the end date and time for the call broadcast. |
| Billing Product | Select the product for which campaign will run. For eg: you have taken a 4000 min plan and a 2000 min plan, then select the plan which you want for the campaign. |
| Channel Limit | Enter the product channel limit. |
| Dial Status | Select the dial status from the dropdown. |
| Allow Numberwise Trunk | Enabling this will help you make broadcast calls from the numbers assigned to your account & can distribute the channels among the numbers. Add Caller Setting : Add more than one caller ID. Available Channels : Displays the number of channels available to make calls. Use Channels: Enter the number of channels that you want to use for your caller ID to make calls (if you choose 10 channels then you can make 5 calls). Delete: Delete the caller ID.. |
| Destination | Choose the destination from the dropdown menu, eg. choose an auto-attendant to greet the callers or thank you message system recording. |
| Ring timeout | Enter the seconds for which the call will ring on the customer's extension. |
| Caller ID Number | Enter the caller ID number which will be displayed at receiver’s end. |
| Concurrent Limit | Enter the maximum number of calls that can be made at a specific point of time. |
| Account DND List | Select the account DND List. |
| Number of Retries | Enter the number of retries allowed. |
| Retry Dial Status | Select the retry dial status from the dropdown. |
| Select an Event | Choose an event for which an SMS should be sent. |
| SMS Template(Missed Call) | Select SMS Template for missed call from the dropdown. |
| SMS Template(Received Call) | Select SMS Template for the received call from the dropdown. |
| A/B Testing toggle | Switch the toggle if you want to enable A/B testing. |
| A/B testing destination | Select 2 to 4 destinations on which A/B testing will be done. |
| Offset | Choose the SMS template to be sent to the customer. |
| Limit | Enter the count of leads to be tested under A/B testing. |
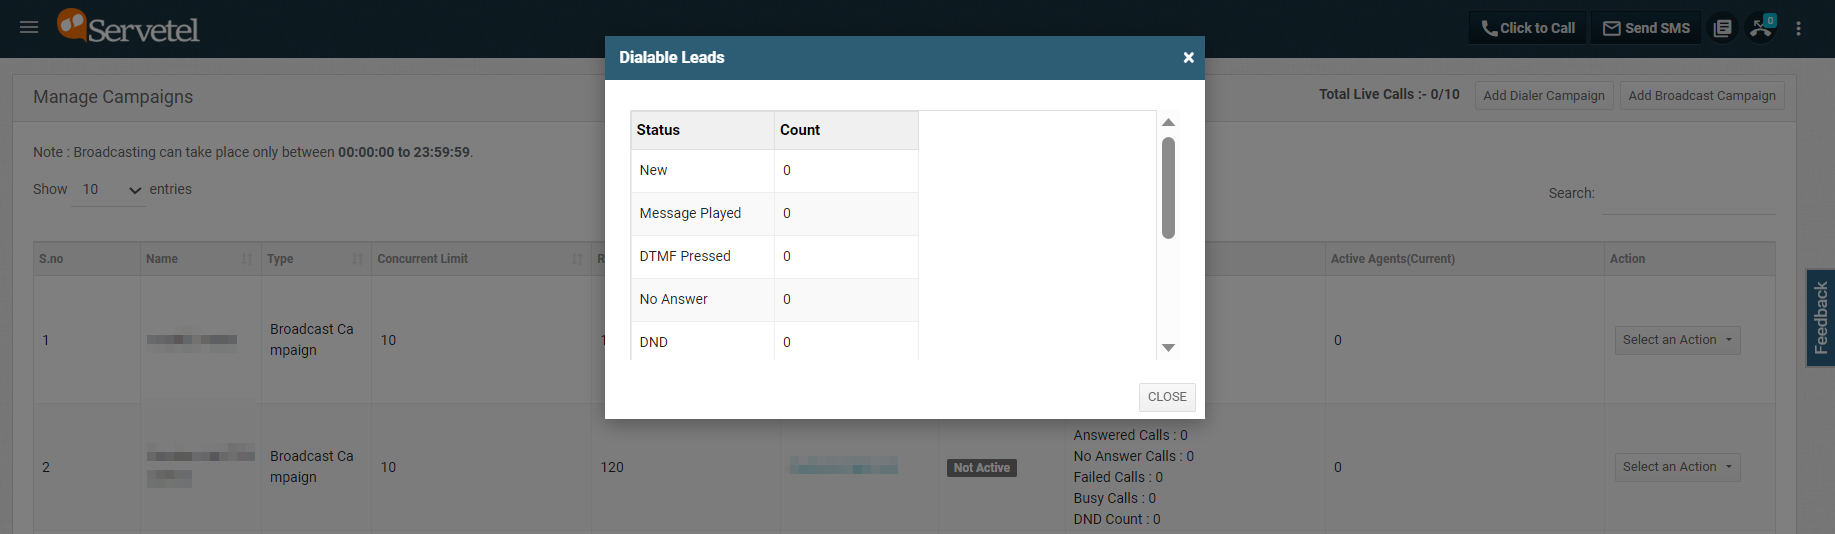
Click on Select an Action to view Call Broadcast details, Disable Leads, View Broadcast, Edit, Start Broadcast, and Delete the chosen broadcast.
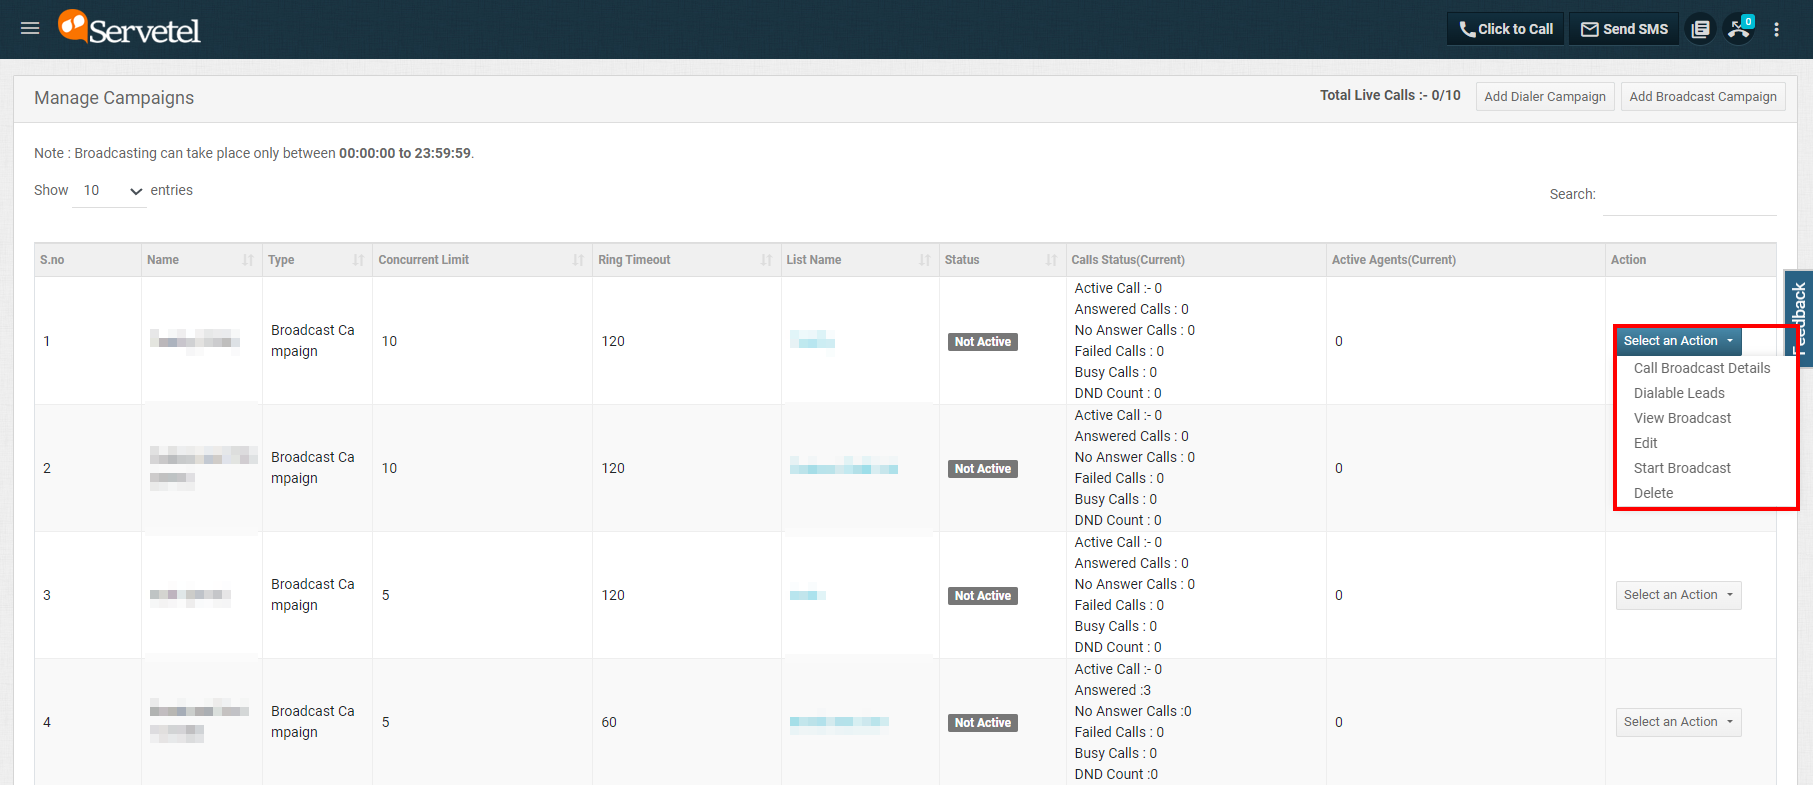
On starting the broadcast, its status will change from Not Active to Active.

To stop the broadcast, click on Select an Action and click Stop Broadcast.
Click on Call Broadcast Details to view the information and download CDR.

Click on Disable Leadsto view the disabled leads.
Updated 5 months ago